

Brorfelde landscape by Stig Nygaard (cb)
After adding an aggressive curve along with a mid-tone luminosity mask.
I had previously written about adapting Tony Kuyper’s Luminosity Masks for GIMP. I won’t re-hash all of the details and theory here (just head back over to that post and brush up on them there), but rather I’d like to re-visit them using channels. Specifically to have another look at using the mid-tones mask to give a little pop to images.
The rest of my GIMP tutorials can be found here:
Getting Around in GIMP
Original tutorial on Luminosity Masks:
Getting Around in GIMP - Luminosity Masks
Luminosity Masking in darktable:
PIXLS.US - Luminosity Masking in darktable
Getting Around in GIMP
Original tutorial on Luminosity Masks:
Getting Around in GIMP - Luminosity Masks
Luminosity Masking in darktable:
PIXLS.US - Luminosity Masking in darktable
Let’s Build Some Luminosity Masks!
The way I had approached building the luminosity masks previously were to create them as a function of layer blending modes. In this re-visit, I’d like to build them from selection sets in the Channels tab of GIMP.For the Impatient:
I’ve also written a Script-Fu that automates the creation of these channels mimicking the steps below.
Download from: Google Drive
Download from: GIMP Registry (registry.gimp.org)
Once installed, you’ll find it under:
Yet another reason to love open-source - Saul Goode over at this post on GimpChat updated my script to run faster and cleaner.
You can get a copy of his version at the same Registry link above.
(Saul’s a bit of a Script-Fu guru, so it’s always worth seeing what he’s up to!)
I’ve also written a Script-Fu that automates the creation of these channels mimicking the steps below.
Download from: Google Drive
Download from: GIMP Registry (registry.gimp.org)
Once installed, you’ll find it under:
Filters → Generic → Luminosity Masks (patdavid)
[Update]Yet another reason to love open-source - Saul Goode over at this post on GimpChat updated my script to run faster and cleaner.
You can get a copy of his version at the same Registry link above.
(Saul’s a bit of a Script-Fu guru, so it’s always worth seeing what he’s up to!)

We’ll start off in a similar way as we did previously.
Duplicate your base image
Either through the menus, or by Right-Clicking on the layer in the Layer Dialog:Layer → Duplicate Layer

Desaturate the Duplicated Layer
Now desaturate the duplicated layer. I use Luminosity to desaturate:Colors → Desaturate…

This desaturated copy of your color image represents the “Lights” channel. What we want to do is to create a new channel based on this layer.
Create a New Channel “Lights”
The easiest way to do this is to go to your Channels Dialog.If you don’t see it, you can open it by going to:
Windows → Dockable Dialogs → Channels

The Channels dialog
On the top half of this window you’ll see the an entry for each channel in your image (Red, Green, Blue, and Alpha). On the bottom will be a list of any channels you have previously defined.
To create a new channel that will become your “Lights” channel, drag any one of the RGB channels down to the lower window (it doesn’t matter which - they all have the same data due to the desaturation operation).
Now rename this channel to something meaningful (like “L” for instance!), by double-clicking on its name (in my case it‘s called “Blue Channel Copy”) and entering a new one.
This now gives us our “Lights” channel, L :

Now that we have the “Lights” channel created, we can use it to create its inverse, the “Darks” channel...
Create a New Channel “Darks”
To create the “Darks” channel, it helps to realize that it should be the inverse of the “Lights” channel. We can get this selection through a few simple operations.We are going to basically select the entire image, then subtract the “Lights” channel from it. What is left should be our new “Darks” channel.
Select the Entire Image
First, have the entire image selected:Select → All
Remember, you should be seeing the “marching ants” around your selection - in this case the entire image.
Subtract the “Lights” Channel
With the entire image selected, now we just have to subtract the “Lights” channel. In the Channels dialog, just Right-Click on the “Lights” channel, and choose “Subtract from Selection”:
You’ll now see a new selection on your image. This selection represents the inverse of the “Lights” channel...
Create a New “Darks” Channel from the Selection
Now we just need to save the current selection to a new channel (which we’ll call... Darks!). To save the current selection to a channel, we can just use:Select → Save to Channel
This will create a new channel in the Channel dialog (probably named “Selection Mask copy”). To give it a better name, just Double-Click on the name to rename it. Let’s choose something exciting, like “D”!
More Darker!
At this point, you’ll have a “Lights” and a “Darks” channel. If you wanted to create some channels that target darker and darker regions of the image, you can subtract the “Lights” channel again (this time from the current selection, “Darks”, as opposed to the entire image).Once you’ve subtracted the “Lights” channel again, don’t forget to save the selection to a new channel (and name it appropriately - I like to name subsequent masks things like, “DD”, in this case - if I subtracted again, I’d call the next one “DDD” and so on…).
I’ll usually make 3 levels of “Darks” channels, D, DD, and DDD:

Three levels of Dark masks created.
Here’s what the final three different channels of darks looks like:

The D, DD, and DDD channels
Lighter Lights
At this point we have one “Lights” channel, and three “Darks” channels. Now we can go ahead and create two more “Lights” channels, to target lighter and lighter tones.The process is identical to creating the darker channels, just in reverse.
Lights Channel to Selection
To get started, activate the “Lights” channel as a selection:
With the “Lights” channel as a selection, now all we have to do is Subtract the “Darks” channel from it. Then save that selection as a new channel (which will become our “LL” channel, and so on…

Subtracting the D channel from the L selection
To get an even lighter channel, you can subtract D one more time from the selection so far as well.
Here are what the three channels look like, starting with L up to LLL:

The L, LL, and LLL channels
Mid Tones Channels
By this point, we’ve got 6 new channels now, three each for light and dark tones:
Now we can generate our mid-tone channels from these.
The concept of generating the mid-tones is relatively simple - we’re just going to intersect dark and light channels to produce whats left - midtones.
Intersecting Channels for Midtones
To get started, first select the “L” channel, and set it to the current selection (just like above). Right-Click → Channel to Selection.Then, Right-Click on the “D” channel, and choose “Intersect with Selection”.
You likely won’t see any selection active on your image, but it’s there, I promise. Now as before, just save the selection to a channel:
Select → Save to Channel
Give it a neat name. Sayyy, “M”? :)
You can repeat for each of the other levels, creating an MM and MMM if you’d like.
Now remember, the mid-tones channels are intended to isolate mid values as a mask, so they can look a little strange at first glance. Here’s what the basic mid-tones mask looks like:

Basic Mid-tones channel
Remember, black tones in this mask represent full transparency to the layer below, while white represents full opacity, from the associated layer.
Using the Masks
The basic idea behind creating these channels is that you can now mask particular tonal ranges in your images, and the mask will be self-feathering (due to how we created them). So we can now isolate specific tones in the image for manipulation.Previously, I had shown how this could be used to do some simple split-toning of an image. In that case I worked on a B&W image, and tinted it. Here I’ll do the same with our image we’ve been working on so far...
Split Toning
Using the image I’ve been working through so far, we have the base layer to start with:
Create Duplicates
We are going to want two duplicates of this base layer. One to tone the lighter values, and another to tone the darker ones. We’ll start by considering the dark tones first. Duplicate the base layer:Layer → Duplicate Layer
Then rename the copy something descriptive. In my example, I’ll call this layer “Dark” (original, I know):

Add a Mask
Now we can add a layer mask to this layer. You can either Right-Click the layer, and choose “Add Layer Mask”, or you can go through the menus:Layer → Mask → Add Layer Mask
You’ll then be presented with options about how to initialize the mask. You’ll want to Initialize Layer Mask to: “Channel”, then choose one of your luminosity masks from the drop-down. In my case, I’ll use the DD mask we previously made:

Adjust the Layer

Make sure you select the layer, and not it’s mask, by clicking on it (you’ll see a white outline around the active layer). Otherwise any operations you do may accidentally get applied to the mask, and not the layer.
At this point, we now want to modify the colors of this layer in some way. There are literally endless ways to approach this, bounded only by your creativity and imagination. For this example, we are going to tone the image with a cool teal/blue color (just like before), which combined with the DD layer mask, will restrict it to modifying only the darker tones.
So I’ll use the Colorize option to tone the entire layer a new color:
Colors → Colorize
To get a Teal-ish color, I’ll pull the Hue slider over to about 200:

Now, pay attention to what’s happening on your image canvas at this point. Drag the Hue slider around and see how it changes the colors in your image. Especially note that the color shifts will be restricted to the darker tones thanks to the DD mask being used!
To illustrate, mouseover the different hue values in the caption of the image below to change the Hue, and see how it effects the image with the DD mask active:


Mouseover to change Hue to: 0 - 90 - 180 - 270
So after I choose a new Hue of 200 for my layer, I should be seeing this:

Repeat for Light Tones
Now just repeat the above steps, but this time for the light tones. So duplicate the base layer again, and add a layer mask, but this time try using the LL channel as a mask.For the lighter tones, I chose a Hue of around 25 instead (more orange-ish than blue):

In the end, here are the results that I achieved:

After a quick split-tone (mouseover to compare to original)
The real power here comes from experimentation. I encourage you to try using a different mask to restrict the changes to different areas (try the LLL for instance). You can also adjust the opacity of the layers now to modify how strongly the color tones will effect those areas as well. Play!
Mid-Tones Masks
The mid-tone masks were very interesting to me. In Tony’s original article, he mentioned how much he loved using them to provide a nice boost to contrast and saturation in the image. Well, he’s right. It certainly does do that! (He also feels that it’s similar to shooting the image on Velvia).
I’ve deleted the layers from my split-toning exercise above, and am back to just the base image layer again.
To try out the mid-tones mask, we only need to duplicate the base layer, and apply a layer mask to it.
This time I’ll choose the basic mid-tones mask M.
What’s interesting about using this mask is that you can use pretty aggressive curve modifications to it, and still keep the image from blowing up. We are only targeting the mid-tones.
To illustrate, I’m going to apply a fairly aggressive compression to the curves by using Adjust Color Curves:
Colors → Curves
When I say aggressive, here is what I’m referring to:

Here is the effect it has on the image when using the M mid-tones mask:

Aggressive curve with Mid-Tone layer mask
(mouseover to compare to original)
As you can see, there is an increase in contrast across the image, as well a nice little boost to saturation. You don’t need to worry about blowing out highlights or losing shadow detail, because the mask will not allow you to modify those values.
More Samples of the Mid-Tone Mask in Use

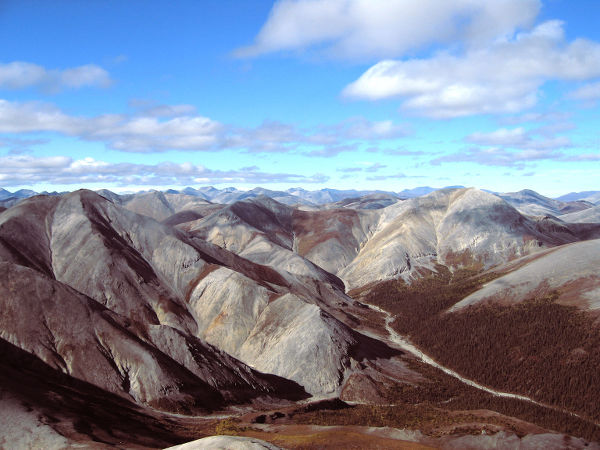
The lede image again, with another aggressive curve applied to a mid-tone masked layer
(mouseover to compare to original)


Red Tailed Black Cockatoo at f/4 by Debi Dalio on Flickr (used with permission)
(mouseover to compare to original)


Stitched photos of the Idaho landscape near Craters of the Moon National Monument
by Frank Kovalchek on Flickr (cb)
(mouseover to compare to original)
Mixing Films
This is something that I’ve found myself doing quite often. It’s a very powerful method for combining color toning that you may like from different film emulations. Consider what we just walked through.These masks allow you to target modifications of layers to specific tones of an image. So if you like the saturation of, say, Fuji Velvia in the shadows, but like the upper tones to look similar to Polaroid Polachrome, then these luminosity masks are just what you’re looking for!
Just a little food for experimentation thought... :)
Stay tuned later in the week where I’ll investigate this idea in a little more depth.
In Conclusion
This is just another tool in our mental toolbox of image manipulation, but it’s a very powerful tool indeed. When considering your images, you can now look at them as a function of luminosity - with a neat and powerful way to isolate and target specific tones for modification.As always, I encourage you to experiment and play. I’m willing to bet this method finds it’s way into at least a few peoples workflows in some fashion.
Help support the site! Or don’t!
I’m not supporting my (growing) family or anything from this website. Seriously.There is only one reason I am writing these tutorials and posts:
I love doing it.
Technically there is a second reason: to give back to the community. Others before me were instrumental in helping me learn things when I first got started, and I’m hoping to pay it forward here.If you want to visit an ad, or make a donation, or even link/share my content, I would be absolutely grateful (and tickled pink). If you don’t it’s not going to affect me writing and posting here one bit.
I’ll keep writing, and I’ll keep it free.
If you get any use out of this site, I only ask that you do one thing:
pay it forward.

Another way that I do is to create a layer mask with a grayscale copy of the original image; invert it; threshold it so that only the bottom 12-16 values are black and the rest white; then use gaussian blur to soften the edges.
ReplyDeleteThat will give you a mask that will protect your highlights even as you use unsharp masking or other methods to increase contrast.
More good stuff, Pat. i'm clipping this one to Evernote so that I can give it the attention it deserves later on. Looks like another weapon in my GIMP arsenal to help improve tones in my landscapes. Thanks for posting this.
ReplyDeleteTwo words: GMIC PLUGIN. You know it's coming. ;-)
ReplyDeleteHaha, it would seem so, but in this case the script-fu does exactly what's intended. (David may prove me wrong and include something anyway, of course!)
DeleteThanks, Patrick - I always enjoy learning new GIMP techniques from your posts! -- Dave
ReplyDeleteYou're very welcome! I hope it's been helpful.
DeleteThanks for the tutorial and making my original picture (http://www.flickr.com/photos/lennartt/7236308092/) look a lot better by levelling the horizon first (it was one of my first pictures, if thats an excuse ;))
ReplyDeleteNo, no, you've got it all backwards. Thank YOU for the neat photo, and for licensing it so that others can share and re-use it! I certainly appreciate it!
DeleteThis is brilliant.
ReplyDeleteThanks! :) I can't take credit for the original work, though - that was Tony Kuyper. I just adapted what he was doing for us GIMP users...
DeleteWell, gimp is where it becomes useful to me. I can see the endless possibilities for this technique in my artwork as well as photo manipulations. Things like my space scenes are going to greatly benefit from this information. And some of us don't use anything other than gimp so that makes you a god-sent.
DeleteThanks for this tutorial! It's opened a lot more possibilities for me and I've been using it quite a lot. One issue I have - after I use the colorize command, my paintbrushes paint the wrong colors? For instance, if I create a white layer and try to paint black on it, it actually "paints" a grey scale version of the image. Any ideas?
ReplyDeleteIt is nice to see tutorials like this. This is very powerfull technique.
ReplyDeleteHowever, I am not able to replicate it. My "Dark" masks is simply too bright. And of course other masks I am creating do look wrong as well. I don't know, if there is something wrong with Gimp setting or Gimp itself (BTW I am using 2.9, October build).
Have you tried any of the scripts to automate the process? I'm wondering if it works ok with the scripts, then there is a problem while trying to replicate it. If it doesn't work with the scripts, then there may be something bigger going on...
DeleteScript gives me errors ("deprecated procedures" but that's expected), but masks look the same as in you article. So it works and I am wrong :). Tried to run script on grayscale gradient, but it produced weird MM and MMM masks. They were shifted towards one side, but in theory they should be simetric.
DeleteAnyway, thanks for the response. Have to try other day with fresh mind :)
Nevermind, It is GIMP. On version 2.8 your technique works fine.
DeleteThank you very much for your work. This will be extremely useful. :) However for me Saul's version of the script doesn't work well, it makes my gimp crash. The original works fine as far as I can tell even if it's not as fast and clean.
ReplyDeletei ran the plugin but it appears it only creates the channel masks. I still have to manually duplicate the layer 9 times, then manually duplicate each channel mask (L,LL,LLL,M,MM,MMM,D,DD,DDD) to each layer. is there any way you can add this to the script.
ReplyDeletei ran the plugin but it appears it only creates the channel masks. I still have to manually duplicate the layer 9 times, then manually duplicate each channel mask (L,LL,LLL,M,MM,MMM,D,DD,DDD) to each layer. is there any way you can add this to the script.
ReplyDeleteThank you so much for this amazing tutorial, and to share with us this technique. I've started to play with it and it really allows to give a "pop" to some images with zero efforts!
ReplyDeleteThere is only one thing that puzzles me a bit: why does the "basic mid-tones" mask look so "dark"? The maximum grayscale value in the mask seems to be systematically below 50%... why not to stretch the tonal range of the mask to the maximum? This would allow for less extreme adjustments on the masked layer. The user could still lower the overall layer opacity to fine-tune the effect (which at the end of the story is exactly the same as having a "darker" mask...). Unfortunately, I'm not good enough in gimp scripting to do that myself.
Another thing that I have noticed while playing with mid-tone masks is that, when combined with a contrast increase, the tend to "kill" the microcontrast in dark areas. I have put an example of what I am talking about at the bottom of this page: http://photoflowblog.blogspot.fr/2014/09/tutorial-creating-and-using-luminosity.html
A little gaussian blur applied to the mask (typically 3 to 5 pixels sigma) greatly reduces this effect. Is there some sort of blurring applied to the masks in the GIMP script?
Thanks again for your helpful and professional work.
Pat, I'm new to Gimp under Linux (Ubuntu 14.04-64). I put the .scm into my ~/.gimp-2.8/plug-ins/ folder (as defined in Gimp prefs) but the filter doesn't show up after a Gimp restart. Checked plug-in browser and it's missing entirely. I tried making the file executable just in case, but no change. Any clue what I'm doing wrong? Thanks!
ReplyDeleteAh, yes. an .scm file is actually a _script_ not a _plug-in_. Just move the file to the Scripts folder (likely something along the lines of: ~/.gimp-2.8/scripts/)
DeleteD'oh. Please ignore former post of mine. scm files go in scripts folder, not plug-ins folder!
ReplyDeleteMany thanks for this! I figured out who to replicate this effect in Darktable:
ReplyDeletehttp://blog.nawaz.org/posts/2015/Jan/luminosity-masks-in-darktable/
Thanks! I figured out who to do this in Darktable:
ReplyDeletehttp://blog.nawaz.org/posts/2015/Jan/luminosity-masks-in-darktable/
(Sorry if this comment shows up twice. I don't know if I screwed up the previous one).
Thanks for the amazing tutorial, Pat! I'm having a bit of trouble here, though. I copied the original layer, desaturated the copy and used one of the RGB channels to make my "lights" channel. However, it seems like the "lights" channel retains a red, green or blue tint depending on the RGB channel I used to create it. When I use "lights" as a mask, any action I take (e.g. bucket fill, drawing, etc) all comes through with a bluish tint. What am I doing wrong??
ReplyDeleteGreat tutorial! I think this is the most useful thing I've learned about GIMP in years. However, I'm seeing an anomaly: the first channel you create has 100% fill opacity, while all the subsequent ones are 50% (actually they seem to become 49.8% when I save and reopen the image - but that's not much difference). I don't know yet what the effects of that difference would be, but it seems that for consistency's sake it would be nice if all channels had the same opacity. Any idea what to do about this?
ReplyDeleteGreat tutorial! Thank you! My first thought when I see these masks is that you could just create them by drawing a tent in curves after desaturating the image. That way you can easily control where they start to fade in and out and create them in a single operation from a grayscale image.
ReplyDeleteHi... This is a great tutorial the only thing I had an issue with was the Midtones -- specifically MM and MMM.
ReplyDeleteNow if I selected LL as the main selection and then intersected with DD, the outcome would be total black layer for MM. I would get the same results for MMM -- black layer -- if I selected LLL as main selection and intersected with DDD.
This confused me a lot. Once I read the script, it seems that LL is selected as the main selection and then selection is invert. With invert selection then DD is subtracted from the selection ( not intersected with LL ). This goes with LLL and DDD. The result is that I am able get the images that you posted on another website.
So there is an error in obtaining MM and MMM.
As a neophyte to all the wonders we can accomplish with GIMP, thank you so much for this in depth article. You've made it so understandable, I now am confident I can process my landscape images to the visions I had in the first place.
ReplyDeleteHello, Pat! I'm trying to use your scm (and the Saul's version for GIMP 2.8, before yours adjustments to 2.9), but everytime I execute, the box of layers flick quickly and nothing happens. Some idea what about is wrong? I'm under Linux Mint 18 Sarah 64-bit with MATE 1.14.1 and my GIMP is 2.8.16. Thanks, Pat.
ReplyDeleteHi! Once the script is done nothing will look like it's changed. If you look at the masks dialog, you should see all of the newly created masks.
Delete