
My hope was to be able to expose some new and interesting ways to approach black and white processing in GIMP, and to give everyone a single point of reference to compare the results to.
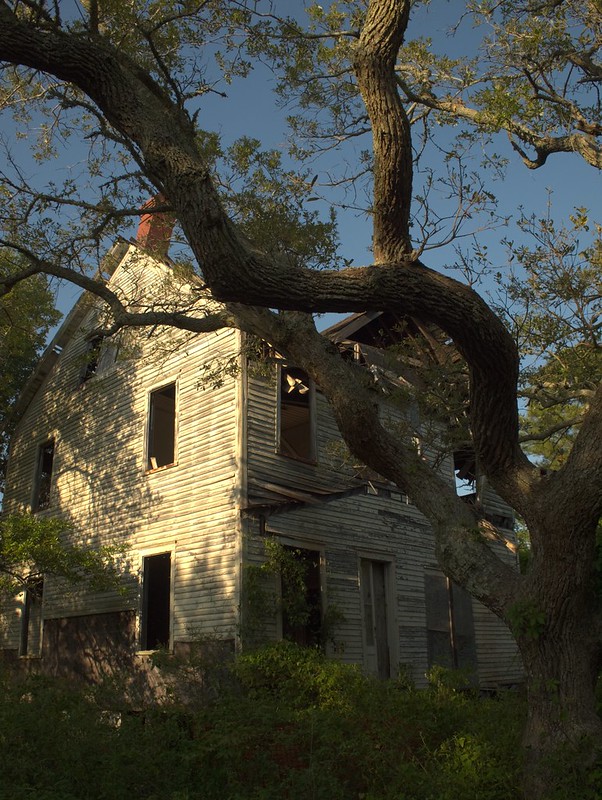 The challenge base image
I had originally envisioned it as a sort of contest where everyone could vote on their favorites at the end, but it became cumbersome to maintain entries across Flickr and gimpchat.com. So instead I've left the posts as they are to hopefully help others to get a look into some cool ways to approach B&W conversions.
I was thinking that this might be a good image to test against because there is bright, just about blown, sunlight on the side of the house, while there are also very dark shadows in some of the windows and bushes. Hopefully a nicely challenging range of luminance and detail to work with!
There were some great responses from everyone who took a stab at it (pun intended - it is Halloween here!). I just wanted to take a moment to highlight a few of the images/processes that I liked personally...
Amelia Bellamy-Royds (AmeliaBr on Flickr)
Amelia did an amazing job, and was much more in line with what I personally was striving for - that is a well processed B&W image with good contrast overall. The shadows didn't fall into inky blackness, and the highs were not overexposed (beyond what was already blown in the source image).
She describes her methodology and workflow in this comment on the Flickr page.
Basically, she either applied a pure black (or white) layer under the color original, then set the blending mode of the original layer to "Value", or she desaturated the original, laying it over the original color layer - and then set the blend mode of the desaturated layer to "Saturation". In both cases she was extracting the Value of the pixel from HSV mode.
This is nice because it then allows her to adjust the levels/curves of the original color layer to affect the final monochrome result. This means she could then independently modify the Red, Green, or Blue curves to adjust their contribution to the final Value result. A fantastic and intuitive way of adjusting the results with instant feedback on the canvas!
Sebastian (absolute_rookie on Flickr)

Sebastian did things a little differently, and I love the result. There's a lovely feeling of softness in his, and the whole thing felt quite dreamy and is very pleasing to look at. He also details his process in the Flickr thread.
In summary, he opted to expose the RAW image three times (proper, under, over), and to merge the results back together using Luminance HDR (no word on which tonemapping operator he decided to use - Mantiuk maybe?). He then brought the results into GIMP and desaturated there (trial and error).
Starting from the RAW file, and under/over exposing a couple of versions likely helped retrieve some of the blownout highlights and shadow detail - so a great idea to approach it in this way!
Oh, and he also produced a really, really nice color version originally before he generated the black and white. You should check it out!
These were just a couple of the great images that resulted - there were many more, and I certainly don't want to exclude anyone. I recommend checking out the threads at Flickr and gimpchat to see some other results!
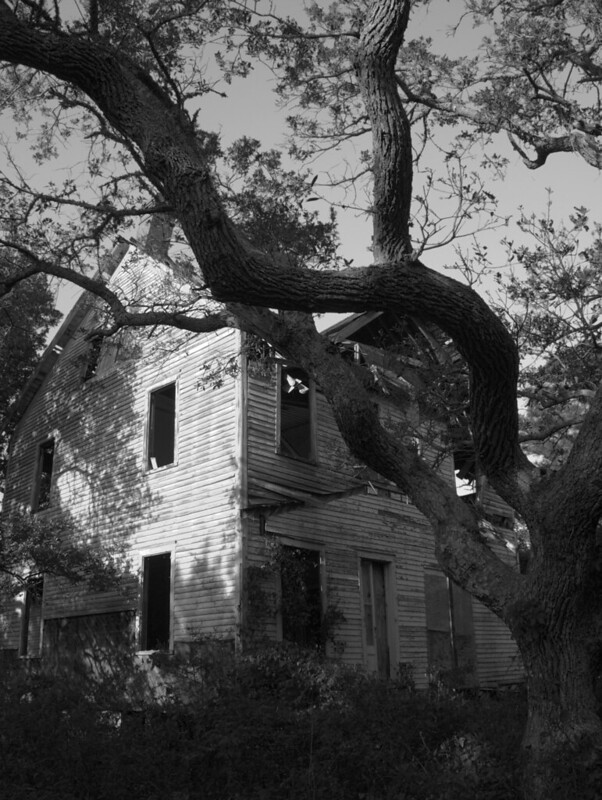
How did mine turn out?
Oh, and if anyone is curious how my own results came out, here is the edit I did the same day I first posted the challenge:
I detailed my process in the Flickr thread as well.
Basically, I started with a Pseudogrey base, then decomposed the original image to RGB layers, and brought each one as a layer separately into my workspace. Then I just used a combination of layer masks and opacity adjustments to tweak the contribution from each channel. (I did a lot of masking/burning/dodging around the bushes in the foreground - they just came out way too flat for me, and I wanted good separation between them and the mid ground).
This has been a really interesting experiment, and I've been blown away by the results and responses. I may just have to look around for another RAW image to post and see what everyone does with it as well.
Also, as I said in my first post on this challenge, I have a great big Black and White Conversion tutorial coming soon that will hopefully address all the different ways and methods for approaching a conversion. Stay Tuned!

No comments:
Post a Comment