Showing posts with label open source. Show all posts

David Tschumperlé and OpenSource.graphics

Some of you may be familiar with G'MIC, the rather extensive image processing language created by David Tschumperlé that has a very popular plug-in for GIMP.

If you're a fan, here's a nice little treat for you. David has started a blog about image processing with open source software:

http://opensource.graphics


If you'd like a front seat to some of the more technically interesting things going on behind the scenes at G'MIC, this would be a good blog to follow I think. He's already come out of the gate with a neat 3D colorcube investigation of some images (seen above, Mairi).

An Open Source Headshot (Ronni) (Postprocessing)

In my previous post I had to do a bit of fiddling to bring my relative exposures back into line with each other (while retaining hair details from being blown out). Now that the image has been corrected, I’m ready to begin my normal workflow for retouching.

The rest of my GIMP tutorials can be found here:
Getting Around in GIMP

To give us an idea of what we’re working towards, here’s my final result for this image:

Ronni 5 GIMP Pat David tutorial
The results I will be working towards.

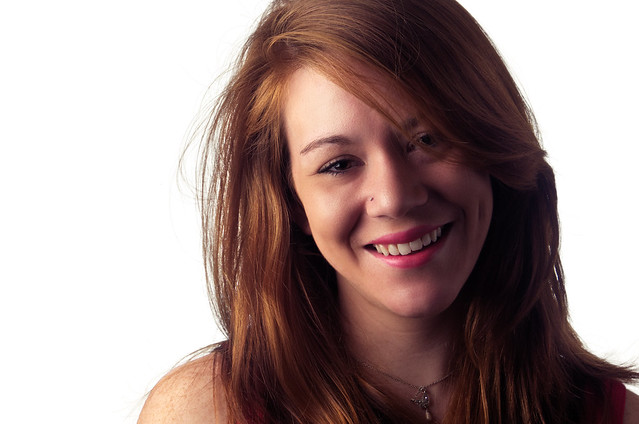
After my corrections in the previous post, here’s the image I’ll be starting with:

Pat David Open Source Headshot Base Image GIMP
My base starting image.

There’s a few different ways to approach retouching this image, and it’s really dependent on the personal preferences of the retoucher. Some may like to fiddle with colors and tones first to set a mood, or possibly look more at general cropping/layouts to taste for instance. There’s quite a few ways to begin, so I can only speak to what I personally like to do.

An Open Source Headshot (Ronni)

I recently had an opportunity to shoot some headshots of a model, Ronni on ModelMayhem. She was kind enough to brave some nasty weather to help get to the shoot. It was my first time shooting with her, and she was super nice (if you're in the Mobile, AL area give her a shout!).

Ronni 2 (Headshot Crop) GIMP Pat David tutorial
My personal favorite of the set.

Ronni 5 GIMP Pat David tutorial
The image we'll be working on in this tutorial.

This post is going to focus on what I had to do to get the final result you see above. I had a couple of small problems that I ran into, but they led to some neat solutions!

The Open Source Portrait (Postprocessing)

In my previous post I walked through the concept and shoot of my portrait of Mairi. At this point all I've got are a bunch of RAW (and jpg) files of the shoot. I know that I forgot to mention it in the last post, but for goodness sake if you can shoot RAW - do it. (It saved my butt with this image, as you'll see below).

Also, you'll be able to download my RAW file, and JPG output from RawTherapee below.

The previous tutorial in this series is here:
The Open Source Portrait (Equipment & Environment)

This is a long post.
Seriously, this is the longest post I've ever written.
I'm walking through many of the things I had previously written tutorials for, and apply them to a process this time so you can see them as part of a workflow.
So, here's a Table of Contents so you can jump to the section you need:
File downloads:
Download the .ORF RAW file [Google Drive]
Download the full resolution JPG from RawTherapee.
Download the Full Resolution .XCF file [.7zip - 265MB]
If you want to use the .XCF file just to see what I did, I recommend the ½ resolution file, as it's smaller.
Download the ½ Resolution .XCF file [.7zip - 60MB]
These files are being made available under a Creative Commons Attribution, Non-Commercial, Share Alike license (CC-BY-SA-NC).
You're free to use them, modify them, and share them as long as you attribute me, Pat David, as the originator of the file. You're not allowed to use these images for Commercial purposes.

And to whet your appetite, here is the final result of all of the postprocessing of my portrait (mouseover to compare it to no retouching):


The final result I'm aiming for
Mouseover to compare to unretouched version

The Open Source Portrait (Equipment & Environment)

As promised, I thought it might be fun/helpful to walk through a portrait shooting session from start to finish using only Free/Open Source Software (F/OSS). This is my personal workflow, and hopefully I can do the subject some justice.


A Model Idiot.

I'm going to walk through the creation of a portrait of my friend Mairi that I did not too long ago. I had been wanting to shoot with Mairi for a while, and only recently got a chance to sit down and actually do it quickly. For reference, here is one of the final results that I'll be walking through the process for:

mairi beautiful model portrait hair eyes GIMP by Pat David
Mairi 6 - possibly my favorite from the shoot.

I say "quickly" because this image was almost spur-of-the-moment, shot in a less than ideal location with about 10 minutes of setup to dial everything in (oh - and was shot while I was keeping an eye on my 2 year old daughter who was running around playing).

The next tutorial in this series is here:
The Open Source Portrait (Postprocessing)