Showing posts with label photography. Show all posts

What's New, Some New Tutorials, and PIXLS!

What's been going on?! A bunch!

In case you've not noticed around here, I've been transitioning tutorials and photography related stuff over to PIXLS.US.

I built that site from scratch, so it's taken a bit of my time... I've also been slowly porting some of my older tutorials that I thought would still be useful over there. I've also been convincing all sorts of awesome folks from the community to help out by writing/recording tutorials for everyone, and we've already got quite a few nice ones over there:


A Blended Panorama with PhotoFlow


Basic Landscape Exposure Blending with GIMP and G'MIC


An Open Source Portrait (Mairi)


Skin Retouching with Wavelet Decompose


Luminosity Masking in darktable


Digital B&W Conversion (GIMP)


So just a gentle reminder that the tutorials have all mostly moved to PIXLS.US. Head over there for the newest versions and brand-new material, like the latest post from the creator of PhotoFlow, Andrea Ferrero on Panorama Exposure Blending with Hugin and PhotoFlow!

Also, don't forget to come by the forums and join the community at:

discuss.pixls.us

That's not to say I've abandoned this blog, just that I've been busy trying to kickstart a community over there! I'm also accepting submissions and/or ideas for new articles. Feel free to email me!

PIXLS.US Now Live!

I checked the first post I had made on PIXLS.US while I was building it, and it appears it was around the end of August, 2014. I had probably been working on it for at least a few weeks before that. Basically, it's almost been about 10 months since I started this crazy idea.


Finally, we are "officially" launched and live. Phew!

Help!


I don't normally ask for things from folks who read what I write here. I'm going to make an exception this time. I spent a lot of time building the infrastructure for what I hope will be an awesome community for free-software photographers.

So naturally, I want to see it succeed. If you have a moment and don't mind, please consider sharing news of the launch! The more people that know about it, the better for everyone! We can't build a community if folks don't know it's there! :) (Of course, come by and join us yourselves as well!).

I'll be porting more of my old tutorials over as well as writing new material there (and hopefully getting other talented folks to write as well).

Thank You!

Also, I want to take a moment to recognize and thank all of you who either donated or clicked on an ad. Those funds are what helped me pay for the server space to host the site as well as the forums, and will keep ads off the site. I'm basically just rolling any donations back into hosting the site and hopefully finding a way to pay folks for writing in the future. Thank you all!

Discourse Forum on PIXLS.US

After a bunch of hard work by someone not me (darix), there's finally a neat solution for commenting on PIXLS.US. An awesome side effect is that we get a great forum along with it.

Discourse

On the advice from the same guy that convinced me to build PIXLS using a static site generator (see above), I ended up looking into, and finally going with, a Discourse forum.


The actual forum location will be at:


What is extra neat about the way this forum works, though, is the embedding. For every post on the pixls.us blog (or an article), the forum will pickup on the post and will automatically create topics on the forum that coincide with the posts. Some small embedding code on the website allows these topic replies to show up at the end of a post similar to comments.

For instance, see the end of this blog post to see the embedding in action!

Come on by!

I personally really like this new forum software, both for the easy embedding, but also the fact that we own the data ourselves and are not having to farm it out through a third party service. I have enabled third party oauth logins if anyone is ok with using them (but are not required to - normal registration with email through us is fine of course).

I like the idea of being able to lower the barrier to participating in a community/forum, and the ability to auth against google or twitter for creating an account significantly lowers that friction I think.

Some Thanks are in Order

It's important to me to point out that being able to host PIXLS.US and now the forum is entirely due to the generosity of folks visiting my blog here. All those cool froods that take a minute to click an ad help offset the server costs, and the ridiculously generous folks that donate money (you know who you are) are amazing.

As such, their generosity means I can afford to bootstrap the site and forums for a little while (without having to dip into the wife goodwill fund...).

What does this mean to the average user? Thanks to the folks that follow ads here or donate, PIXLS.US and the forum is ad-free. Woohoo!

Luminosity Masking in darktable (Ian Hex)

Photographer Ian Hex was kind enough to be a guest writer over on PIXLS.US with a fantastic tutorial on creating and using Luminosity Masks in the raw processing software darktable.


You can find the new tutorial over on PIXLS.US:


Mairi Trois


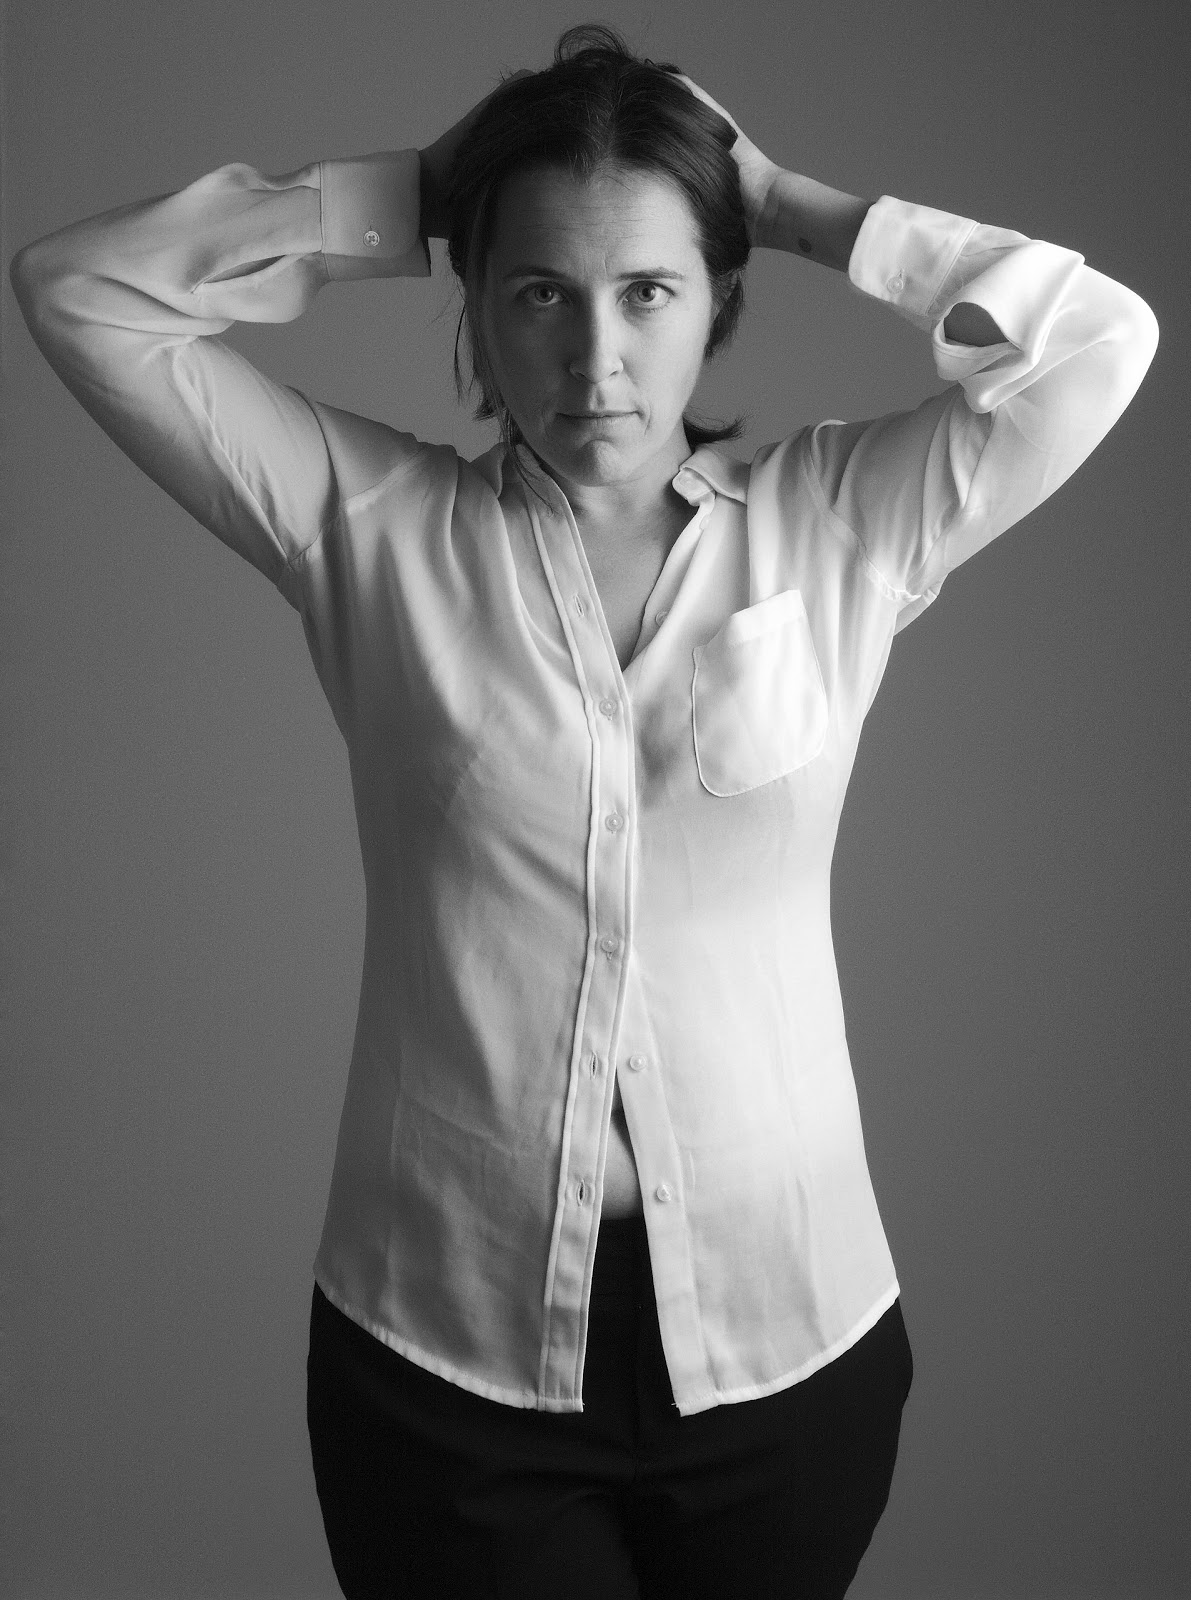
Readers who've been here for a little while might recognize my friend Mairi, who has modeled for me before. This time I had a brief opportunity for her to sit for me again for a few shots before she jet-setted her way over to Italy for a while.

I was specifically looking to produce the lede image you see above, Mairi Troisième. In particular, I was chasing some chiaroscuro portrait lighting that I had in mind for a while and I was quite happy with the final result!

Of course, I also had a large new light modifier, so bigger shots were fun to play with as well:


Mairi Color (in Black)
ƒ/6.3 1/200s ISO200


Mairi B&W
ƒ/8.0 1/200s ISO200

Those two shots were done using a big Photek Softlighter II [amazon] that I treated myself to late last year. (I believe the speedlight was firing @3/4 power for these shots).

It wasn't all serious, there were some funny moments as well...


My Eyes Are Up Here
ƒ/7.1 1/200s ISO200

Of course, I like to work up close to a subject personally. I think it gives a nicer sense of intimacy to an image.


More Mairi Experiments
ƒ/11.0 1/200s ISO200


Mairi Trois
ƒ/8.0 1/200s ISO200

Culminating at one of my favorites from the shoot, this nice chiaroscuro image up close:


Mairi (Closer)
ƒ/10.0 1/200s ISO200

It's always a pleasure to get a chance to shoot with Mairi. She's a natural in front of the camera, and has these huge expressive eyes that are always a draw.

Later this week, an update on PIXLS.US!

Something Wicked This Way Comes...

I've been working on something, and I figured that I should share it with anyone who actually reads the stuff I publish here.

I originally started writing here as a small attempt at bringing tutorials for doing high-quality photography using F/OSS to everyone. So far, it's been amazing and I've really loved meeting and getting to know many like-minded folks.

I'm not leaving. Having just re-read that previous paragraph makes it sound like I am. I'm not.

I am, however, working on something new that I'd like to share with you, though. I've called it:


I've been writing to hopefully help fill in some gaps on high-quality photographic processes using all of the amazing F/OSS tools that so many great groups have built, and now I think it's time to move that effort into its own home.

F/OSS photography deserves its own site focused on demonstrating just how amazing these projects are and how fantastic the results can be when using them.

I'm hoping pixls.us can be that home. Pixel-editing for all of us!

I'm been building the site in my spare time over the past couple of weeks (I'm building it from scratch, so it's going a little slower than just slapping up a wordpess/blogger/CMS site). I want the new site to focus on the content above all else, and to make it as accessible and attractive as possible for users. I also want to keep the quality of the content as high as possible.

If anyone would like to contribute anything to help out: expertise, artwork, images, tutorials and more, please feel free to contact me and let me know. I'm in the process of porting my old GIMP tutorials over to the new site (and probably updating/re-writing a bunch of it as well), so we can have at least some content to start out with.

If you want to follow along my progress at the moment while I build out the site, I'm blogging about it on the site itself at http://pixls.us/blog. As mentioned in the comments, I actually do have an RSS feed for the blog posts, I just hadn't linked to it yet (working on it quickly). The location (should your feedreader not pick it up automatically now) is: http://pixls.us/blog/feed.xml.

If you happen to subscribe in a feedreader, please let me know if anything looks off or broken so I can fix it! :)

Things are in a constant state of flux at the moment (did I mention that I'm still building out the back end?), so please bear with me. Please don't hesitate for a moment to let me know if something looks strange, or with any suggestions as well!

When it's ready to go, I'm going to ask for everyones help to get the word out, link to it, talk about it, etc. The sooner I can get it ready to go, the sooner we can help folks find out just how great these projects are and what they can do with them!

Excelsior!

Faking an ND Filter for Long Exposure Photography

So, I’ve had this idea bouncing around in my head for a bit, and figured it might help me to get off my ass and actually try it out if I described my thought process.

Long Exposure - Shanklin
Long Exposure - Shanklin by Richard 'Tenspeed' Heaven, (cb)
5 sec  f/32 ISO 100

I’ve been wanting to get some ND filters to experiment with daytime long exposures for a while now. The problem is that I’m lazy. So when I say “for a while now”, I really mean that it’s been like 3 years.

Film Emulation Presets in G'MIC (GIMP) [Addendum]

Well, it's been a busy week. I thought it would be nice to post a small update on the current status of these film emulation presets.

In my first post on these, I described what I was doing. At that time, I had only a few different film emulations to go with it. I released a couple of more earlier this week as well (instant films). Here is the current types of film available, with sample plates at their lowest settings to show what they look like (and a preview of some new stuff coming soon).

Film Emulation Presets in G'MIC (GIMP)

Color toning/grading can be a heck of a rabbit-hole sometimes. You start innocently enough, but hours later you’ll find yourself still fiddling with one particular point in one particular channel. Just a little bit more to get it just right! Just a slight bump to saturation in this color! Push the hue a little more this way!


Mairi. Kodak Portra 400 NC Emulation (Strongest setting)
(mouseover for original)


It may seem trivial, but these tiny differences can mean the world to obsessive-compulsive types. I’m speaking from experience because I just finished clawing my way out of the rabbit hole...

I brought some things back with me, though.

An Open Source Headshot (Ronni) (Postprocessing)

In my previous post I had to do a bit of fiddling to bring my relative exposures back into line with each other (while retaining hair details from being blown out). Now that the image has been corrected, I’m ready to begin my normal workflow for retouching.

The rest of my GIMP tutorials can be found here:
Getting Around in GIMP

To give us an idea of what we’re working towards, here’s my final result for this image:

Ronni 5 GIMP Pat David tutorial
The results I will be working towards.

After my corrections in the previous post, here’s the image I’ll be starting with:

Pat David Open Source Headshot Base Image GIMP
My base starting image.

There’s a few different ways to approach retouching this image, and it’s really dependent on the personal preferences of the retoucher. Some may like to fiddle with colors and tones first to set a mood, or possibly look more at general cropping/layouts to taste for instance. There’s quite a few ways to begin, so I can only speak to what I personally like to do.

A Simple Headshot (of Myself)

I needed a new headshot for something recently, and I figured it might be fun to expand a little on something I started playing with while shooting my friend Mairi. I wanted to work on getting my backgrounds blown out to pure white.

I think this was mostly due to reading the great Zack Arias “White Seamless Tutorial”, and trolling around on The Strobist again. I also just got my camera back, so it was as good a time as any to put it through some paces… (Plus, I needed the practice).

So first, here is the final result after all of my fiddling:

Pat David self portrait lighting
Could have been a lot worse, I think…

So my first desire in shooting this was to play with getting the background blown to pure white. I happened to have a whiteboard in my office conference room that I figured would be a good background to start with.

Getting Around in GIMP - Photography Plugins & Tools

After a recent post I came across on the FOSSPhotography sub on reddit that proposed to list the “Must Have GIMP Plugins for Photographers” I got a bit irked. I made a snarky comment about how crappy the linked post was, and the mod made a pretty level-headed response: “Make a list and submit it”. So here I am.

Just a little disclaimer before I get started. This is not a comprehensive list at all. Most of my work utilizes the built–in functionality of GIMP. So they are not all done with plug–ins/scripts, rather I’ll work those built–in functions manually to modify my images. I’m 100% positive I’ve left a few other great things out, but not intentionally for the most part. If I am missing something that you think I really should have included, let me know in the comments!

Also, this is what works for me. I make no claims that this is the way you should approach things (except for the learning concepts part - everyone should learn to approach things that way).

Mr. Presidents

I've been pretty busy lately, and haven't had a chance to post anything, but that doesn't mean I haven't been fooling around when I can! Here's a finished blended amalgam from the other night:

Mr. Presidents by Pat David Amalgam
Mr. Presidents by Pat David (cc-by-nc-sa)

This is every one of the U.S. Presidential portraits (except one) all blended in Imagemagick. Once using an average, and a second one using median blending. I brought these into GIMP and overlayed the median blend at 50% opacity.

Bouncing Baby Beverly Tutorial (Making Babies Fly)

Way back in November, 2011 I had written a tutorial for PetaPixel that walked through how I created the image of my daughter bouncing out of her crib:

Bouncing Baby Beverly
Bouncing Baby Beverly by Pat David, on Flickr

I realized that the tutorial only existed over on PetaPixel, and that I should probably just put a copy of it here for anyone interested. So here it is.

Using Imagemagick to Create Contact Sheets (Montage)

In my previous post on postprocessing my Open Source portrait, I had shown a couple of contact sheets that I had generated to help me narrow down which images I liked. That contact sheet looked like this:


Contact sheets are a great holdover from the days of film, when you wanted a big overview of all the shots on a strip of film. After developing the film, you could just lay a sheet of photo paper under the enlarger, lay your strips of film on top, put a glass plate over the whole thing to hold them down, and then expose with white light for a small amount of time.

The Open Source Portrait (Postprocessing)

In my previous post I walked through the concept and shoot of my portrait of Mairi. At this point all I've got are a bunch of RAW (and jpg) files of the shoot. I know that I forgot to mention it in the last post, but for goodness sake if you can shoot RAW - do it. (It saved my butt with this image, as you'll see below).

Also, you'll be able to download my RAW file, and JPG output from RawTherapee below.

The previous tutorial in this series is here:
The Open Source Portrait (Equipment & Environment)

This is a long post.
Seriously, this is the longest post I've ever written.
I'm walking through many of the things I had previously written tutorials for, and apply them to a process this time so you can see them as part of a workflow.
So, here's a Table of Contents so you can jump to the section you need:
File downloads:
Download the .ORF RAW file [Google Drive]
Download the full resolution JPG from RawTherapee.
Download the Full Resolution .XCF file [.7zip - 265MB]
If you want to use the .XCF file just to see what I did, I recommend the ½ resolution file, as it's smaller.
Download the ½ Resolution .XCF file [.7zip - 60MB]
These files are being made available under a Creative Commons Attribution, Non-Commercial, Share Alike license (CC-BY-SA-NC).
You're free to use them, modify them, and share them as long as you attribute me, Pat David, as the originator of the file. You're not allowed to use these images for Commercial purposes.

And to whet your appetite, here is the final result of all of the postprocessing of my portrait (mouseover to compare it to no retouching):


The final result I'm aiming for
Mouseover to compare to unretouched version

The Open Source Portrait (Equipment & Environment)

As promised, I thought it might be fun/helpful to walk through a portrait shooting session from start to finish using only Free/Open Source Software (F/OSS). This is my personal workflow, and hopefully I can do the subject some justice.


A Model Idiot.

I'm going to walk through the creation of a portrait of my friend Mairi that I did not too long ago. I had been wanting to shoot with Mairi for a while, and only recently got a chance to sit down and actually do it quickly. For reference, here is one of the final results that I'll be walking through the process for:

mairi beautiful model portrait hair eyes GIMP by Pat David
Mairi 6 - possibly my favorite from the shoot.

I say "quickly" because this image was almost spur-of-the-moment, shot in a less than ideal location with about 10 minutes of setup to dial everything in (oh - and was shot while I was keeping an eye on my 2 year old daughter who was running around playing).

The next tutorial in this series is here:
The Open Source Portrait (Postprocessing)

Mairi

I finally got a chance recently to quickly photograph my friend Mairi.


She's a beautiful woman who happens to be a keen-eyed photographer as well. The best part, though, is that she has modeled in the past, which made her the perfect person to shoot with!

Focus Stacking Macro Photos (Enfuse)


I recently got a new camera to update my aging (gracefully!) Olympus E-P1. Deciding to stay with the µ4⁄3rds (or µ43rds, or micro four-thirds - I just wanted to play with some HTML entity codes), I found a really tasty new Olympus OM-D E-M5 waiting for me for Christmas! In deciding which kit lens to go ahead and get with it, the Olympus M.ZUIKO DIGITAL ED 12-50mm F3.5-6.3 EZ was a no brainer. Water-resistant (to match the camera), and a neat macro function!

This article is about focus stacking, for exposure blending, see here:
Automatic Exposure Blending with Enfuse (HDR-ish)

Well, I couldn't help but snap a couple of macro shots of my trusty Warhammer 40k Space Marine to play with this newfangled lens.

The problem, if you haven't done macro photography before, is that the depth of field will become razor-thin. You can alleviate it a bit by closing down the aperture a bit, but at some point you'll hit diffraction limits (and reduced sharpness).

(Abandoned) Splendid China Florida

I was fortunate enough on a recent family trip to stay in a vacation home in Kissimmee, FL for a week. We had passes to Disney, and made good use of them. With kids, though, late nights were not going to be possible.

Luckily for me, on the drive to the house itself, there was a rather large property off the road that was surrounded by a wall that was just barely containing some wild overgrowth. Obviously an abandoned property, it piqued my interest enough to have me take a quick gander at Google maps to see what lay beyond the wall.

Imagine my surprise when I realized that just a few blocks from where I was staying was the rotting carcass of the Splendid China theme park!